Foreword
The following is a quick start guide for gettting Solr configured, up and running in a few minutes. All of my examples will be performed on CentOS Linux.
Getting Started
First things first, make sure you have Java installed and ready. Next download a Solr release:
http://www.apache.org/dyn/closer.cgi/lucene/solr/
Then extract it:
tar -xpf apache-solr-1.4.1.tgz
This is just preference, but I like to work off of a short name by creating a symbolic link to the full version directory like so:
ln -s apache-solr-1.4.1 apache-solr
Now we’re going to need a solid web server, I suggest using something like Tomcat or other comparable Java server. Download tomcat at:
http://tomcat.apache.org/download-60.cgi
Then extract it:
tar xpf apache-tomcat-6.0.29.tar.gz
Once again, not a requirement but for personal ease of use, I create a symbolic link. ln -s apache-tomcat-6.0.29 apache-tomcat
Next let’s copy out the WAR file to tomcat:
cp apache-solr/example/webapps/solr.war apache-tomcat/webapps/
Now we need to copy out an example Solr configuration directory:
cp -R apache-solr/example/solr .
Good, now that’s it for the prep work. Now all we have to do is configure Solr for our specific needs.
Configuring Solr
First let’s setup or configuration file that tells Solr where to store it’s data files. Open solr/conf/solrconfig.xml in an editor:
vi solr/conf/solrconfig.xml
Find the section that looks like this:
<!-- Used to specify an alternate directory to hold all index data
other than the default ./data under the Solr home.
If replication is in use, this should match the replication configuration. -->
<dataDir>${solr.data.dir:./solr/data}</dataDir>
Change the <dataDir> contents to point to where the data will be stored. In our case use the location of the solr directory. Something like:
<dataDir>/home/godlikemouse/solr/data</data>
Otherwise when you start Tomcat, it will just put the data directory in the directory in your current directory, wherever that may be. Not a good idea.
Now it’s on to the fun part. We need to tell Solr how to index our data. That is, what form to store the data in. Open solr/conf/schema.xml in an editor.
vi solr/conf/schema.xml
Now look for this section:
<fields>
<!-- Valid attributes for fields:
name: mandatory - the name for the field
type: mandatory - the name of a previously defined type from the
<types> section
indexed: true if this field should be indexed (searchable or sortable)
stored: true if this field should be retrievable
compressed: [false] if this field should be stored using gzip compression
(this will only apply if the field type is compressable; among
the standard field types, only TextField and StrField are)
multiValued: true if this field may contain multiple values per document
omitNorms: (expert) set to true to omit the norms associated with
this field (this disables length normalization and index-time
boosting for the field, and saves some memory). Only full-text
fields or fields that need an index-time boost need norms.
termVectors: [false] set to true to store the term vector for a
given field.
When using MoreLikeThis, fields used for similarity should be
stored for best performance.
termPositions: Store position information with the term vector.
This will increase storage costs.
termOffsets: Store offset information with the term vector. This
will increase storage costs.
default: a value that should be used if no value is specified
when adding a document.
-->
This is going to be a bit confusing if this is your first time dealing with Solr, but just hang in there, it’s not really as bad as it seems.
Inside the <fields> node is where we will define how and what data will be stored. Let’s say for instance that all you wanted to store was:
idfirst_namelast_name
Say, fields from a database user table for instance. In that case we could remove all of the current field definitions, that is, all of the <field name="... nodes and replace them with our own. In this case what we’d want is:
<field name="id" type="string" indexed="true" stored="true" required="true" />
<field name="first_name" type="string" indexed="true" stored="true" required="true" />
<field name="last_name" type="string" indexed="true" stored="true" required="true" />
Here’s what the above defines:
Each node defines a field to be used by Solr (obviously).
The name attribute tells us, well…the name.
The type attribute specifies the type of the data.
The indexed attribute determines whether or not the field is searchable. We can actually create fields that get kept by Solr, but are not searchable.
The stored attribute tells Solr to keep the data when it’s received.
The required attribute tells Solr whether it needs to explicitly refuse data that does not contain all the required fields. In other words, anything we mark as required, better be there.
So now we’ve defined what our data will look like, we need to create a simple search field that will aggregate all of the values together for searching purposes. In other words, what we have will allow us to specifically search for a first_name, last_name or id. But what if we don’t know what we’re searching for just yet. Let’s create a field that we can put the first and last name into to make it more searchable. To do this create the following node:
<field name="text" type="text" indexed="true" stored="false" multiValued="true"/>
We will store all field concatenated search values in the text field. Now if you scroll down in your editor a bit, you’ll see this:
<!-- Field to use to determine and enforce document uniqueness.
Unless this field is marked with required="false", it will be a required field
-->
<uniqueKey>id</uniqueKey>
<!-- field for the QueryParser to use when an explicit fieldname is absent -->
<defaultSearchField>text</defaultSearchField>
This was already setup for is. It tells Solr to use the “id” field as an index for all the records we are going to send to it. It also tells Solr that if we don’t specify a specific field to search, to just use the “text” field we defined.
Alright, now let’s tell Solr to copy the first_name and last_name fields into our searchable text field. Scroll down a bit in your editor and find the <copyField> nodes similar to this:
<copyField source="cat" dest="text"/>
<copyField source="name" dest="text"/>
<copyField source="manu" dest="text"/>
<copyField source="features" dest="text"/>
<copyField source="includes" dest="text"/>
<copyField source="manu" dest="manu_exact"/>
Go ahead and remove all of those, we’re going to define our own. We only want our first_name and last_name fields to get copied into our default searchable text field:
<copyField source="first_name" dest="text"/>
<copyField source="last_name" dest="text"/>
Now we’re good to go, let’s spin up the server.
./tomcat/bin/catalina.sh run
You should see a bunch of output for Tomcat. The run argument tells Tomcat to launch in a single process debug mode. If you have made any errors up to this point. Tomcat will show them to you. Hopefully you haven’t, but if you have just read through the output carefully and correct any mistakes as you find them.
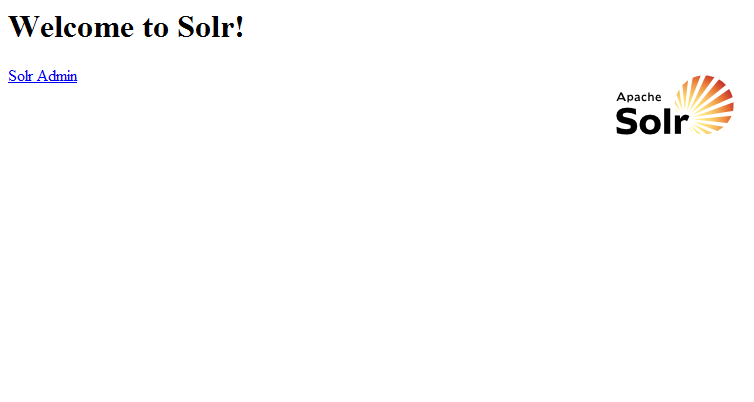
Assuming all went well, you can open up a browser and go to the admin page for Solr at: http://localhost:8080/solr
Once you see the “Welcome to Solr!” screen, you know you’ve arrived. 🙂
The only thing left to do is to start populating your Solr instance with data and try searching it. Shall we?
Data Importing
There are a number of ways to import data into Solr, one of the easiest is to send and post directly to Solr. For this example, let’s build a simple PHP XML command line script called update-solr.php:
#!/usr/bin/php
<?php
/**
* Simple general purpose function for updating Solr
* @param string $url Solr URL for updating data
* @param string $postXml XML containing update information
* @return string Solr response **/
function updateSolr($url, $postXml){
$ch = curl_init($url);
curl_setopt($ch, CURLOPT_POSTFIELDS, $postXml);
curl_setopt($ch, CURLOPT_RETURNTRANSFER, 1);
curl_setopt($ch, CURLOPT_POST, 1);
curl_setopt($ch, CURLOPT_FRESH_CONNECT, 1);
$header[] = "SOAPAction: $url";
$header[] = "MIME-Version: 1.0";
$header[] = "Content-type: text/xml; charset=utf-8";
curl_setopt($ch, CURLOPT_HTTPHEADER, $header);
$r = curl_exec($ch);
if(!$r)
echo "Error: " . curl_error($ch) . "n";
curl_close($ch);
return $r;
}//end updateSolr()
// Build a simple XML string to add a new record.
// PHP command line parameters are received in $argv array.$xml = "
<add>
<doc>
<field name="id">$argv[1]</field>
<field name="first_name">$argv[2]</field>
<field name="last_name">$argv[3]</field>
</doc>
</add>";
updateSolr($argv[0], $xml);
<div id="_mcePaste">// Lastly let's commit our changes</div>
<div id="_mcePaste">updateSolr($url, "<commit />");
The above command line PHP script should be pretty self explanatory, but just in case it is not, here’s the explanation. The “updateSolr” function makes to call to Solr and posts the XML to it. The information is set via the command line upon invocation. So let’s try making an update:
First let’s make the script executable: chmod a+x update-solr.php
Next let’s update Solr with a few test records:
./update-solr.php http://localhost:8080/solr/update 1 John Doe
./update-solr.php http://localhost:8080/solr/update 2 Jane Doe
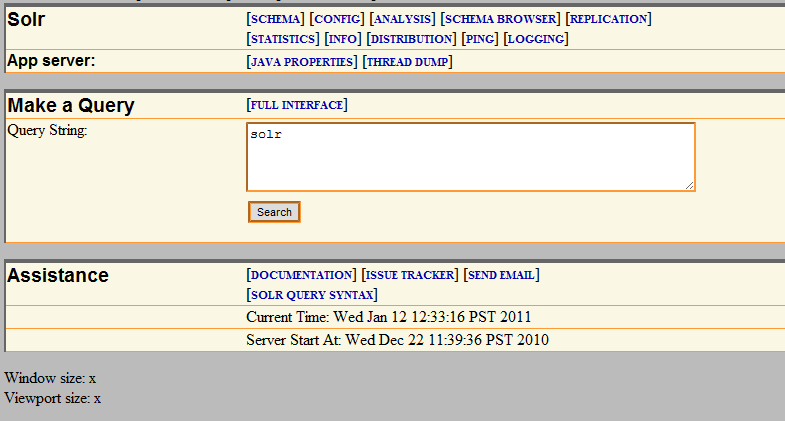
Next let’s view what’s been imported into Solr so far. Open a browser and go to http://localhost:8080/solr, next click the “Solr Admin” link.
Next replace the Query String field (currently displaying “solr”) with a search for value. Something like “John” or “Jane”. Next click the “Search” button and the results are displayed in XML. That’s all there is to it. If you’d like to do a get request to try searching from your application, simply copy the URL currently displayed in the address bar for the search results and modify as you see fit.


0 Comments