Introduction
The following is a quick start guide to getting up and running with Windows Azure and Blob storage using Java. First thing you’ll need to do is setup a Windows Azure account, you can do that here: https://www.windowsazure.com
Install Azure SDK
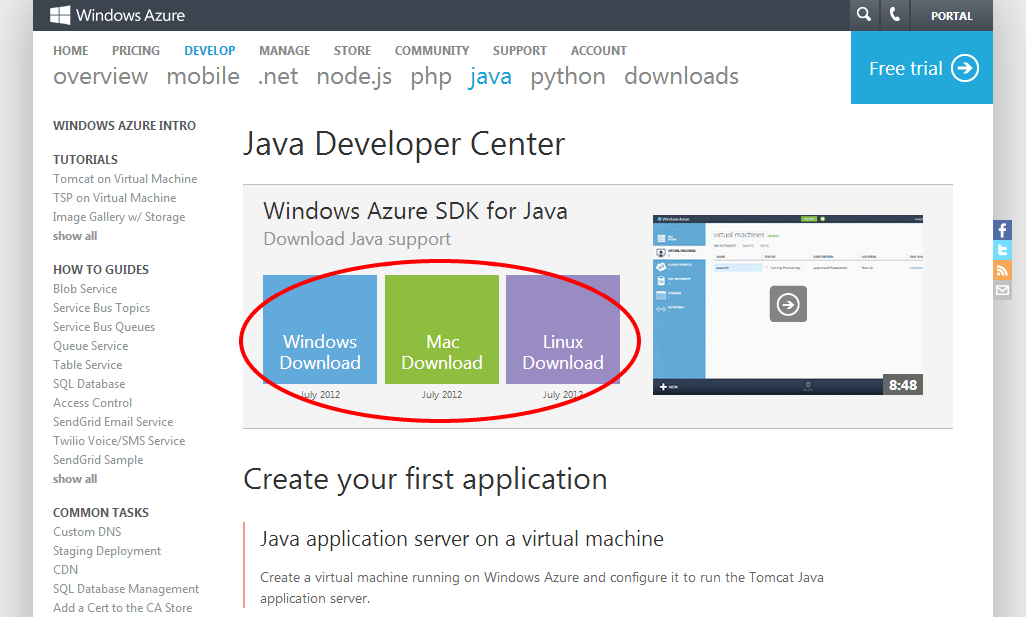
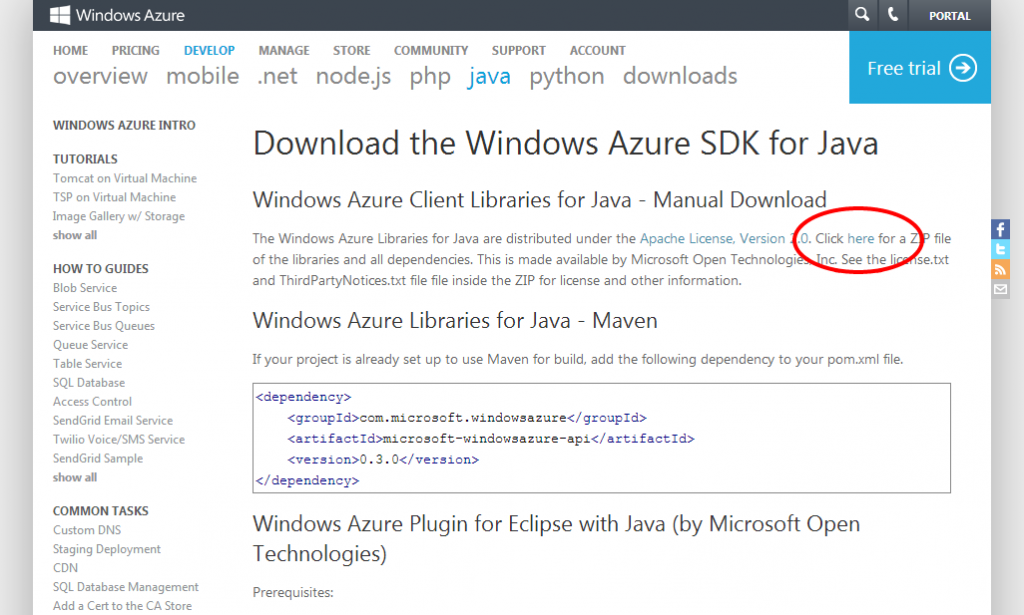
Next you’ll need to download the Azure SDK for Java which is available here: https://www.windowsazure.com/en-us/develop/java/

I found it easier to simply download the libraries directly and include the azure jar file (microsoft-windowsazure-api-0.3.2.jar) directly.

Name And Key
Next you’ll need to capture your Account Name and Account Key.

Now For The Code
Now for the fun part, the code. I’ve already done a lot of the heavy lifting for you (you’re welcome) so all you’ll really need to do is modify a few values and implement as needed. So the first thing you’ll need is to take the Key values from above and create an Azure connection string like so:
1 2 3 4 5 | // Replace your-account-name and your-account-key with your account valuespublic static final String storageConnectionString = "DefaultEndpointsProtocol=http;" + "AccountName=your-account-name;" + "AccountKey=your-account-key"; |
Now let’s create a client which we’ll use to communicate with the Azure blob storage.
1 2 3 4 5 | // Connection StringCloudStorageAccount storageAccount = CloudStorageAccount.parse(storageConnectionString);// Create the clientCloudBlobClient blobClient = storageAccount.createCloudBlobClient(); |
Now that we have a client we can begin performing actions like upload, listing and retrieving files. Let’s start with listing files. You’ll need a root container name, this is essentially the name of the bucket that you’re going to be sticking your files in. Now let’s list some files:
1 2 3 4 5 6 7 8 9 10 11 12 13 14 15 | // Change this to your container nameString containerName = "your-container-name";// Create the clientCloudBlobClient blobClient = storageAccount.createCloudBlobClient();// Get a reference to the containerCloudBlobContainer container = blobClient.getContainerReference(containerName);// Create the container if it does not existcontainer.createIfNotExist();// List themfor (ListBlobItem blobItem : container.listBlobs()) System.out.println(blobItem.getUri()); |
Understanding What We Did
So here’s what’s going on, we’re using the blob client we created which is looking at the container (or root bucket) and generating a list of the blobs there, if it container doesn’t exist we create it. Next we’re iterating the blobs and displaying the URI for each. Now let’s say we had a folder structure on that container. Something to the extent of an images directory with image files inside it. Here’s how you’d list those files:
1 2 3 4 5 6 7 8 9 10 11 12 13 14 15 16 17 18 | // Change this to your container nameString containerName = "your-container-name";// Create the clientCloudBlobClient blobClient = storageAccount.createCloudBlobClient();// Get a reference to the containerCloudBlobContainer container = blobClient.getContainerReference(containerName);// Create the container if it does not existcontainer.createIfNotExist();// Get a reference to the images directoryCloudBlobDirectory directory = container.getDirectoryReference("images/");// List themfor (ListBlobItem blobItem : directory.listBlobs()) System.out.println(blobItem.getUri()); |
The only real difference between this example and the previous one is simply the list of either the container or the directory. In this case we get a reference to the cloud directory then list. Now that we can list container and directory contents, let’s upload some files:
1 2 3 4 5 6 7 8 9 10 11 12 13 14 15 16 17 18 19 20 21 | // Change to your file to uploadFile source = new File("path/to/your/file");// Where are we going to store the files?String uri = "your-container-name/images";// Change this to your container nameString containerName = "your-container-name";// Create the clientCloudBlobClient blobClient = storageAccount.createCloudBlobClient();// Retrieve reference to a previously created containerCloudBlobContainer container = blobClient.getContainerReference(uri);// Create the container if it does not existcontainer.createIfNotExist();// Let's upload the file.CloudBlockBlob blob = container.getBlockBlobReference(source.getName());blob.upload(new FileInputStream(source), source.length()); |
The above example will upload the source file into the images directory of your container. The only thing left to do now is download a file and pattern is complete.
1 2 3 4 5 6 7 8 9 10 11 12 13 14 15 16 17 18 | // Where are we going to save the downloaded file?File destination = new File("path/to/your/file");// Change this to your container nameString containerName = "your-container-name";// Get a reference to the containerCloudBlobContainer container = blobClient.getContainerReference(containerName);// Create the container if it does not existcontainer.createIfNotExist();// Get the actual Azure storage uriCloudBlobDirectory directory = container.getDirectoryReference("images/");String fileUri = String.format("%s/%s", directory.getUri(), destination.getName());// Download itblobItem.download(new FileOutputStream(destination)); |
Conclusion
And that’s the whole enchilada, hopefully this helped you save a little bit of time and got you up to speed quickly…and I’m out.


0 Comments